Question: How do I setup my POP3 Email Account with Microsoft Windows Live Mail on Windows Vista or Windows 7?
Setting up a POP3 account with Microsoft Windows Live Mail
Summary:
Here is a quick summary of the important settings to use:
Account Type: POP3
Email Address: username@kattare.com (your full email address)
Incoming Mail Server: mail.kattare.com
Incoming Mail User Name: (your POP3 username as displayed in the Email Management here.)
Incoming Mail Password: (your POP3 password from the same page.)
Outgoing Mail Server: mail.kattare.com, USE AUTHENTICATION
Outgoing Mail User Name: (your POP3 username as displayed in the Email Management here.)
Outgoing Mail Password: (your POP3 password from the same page.)
Outgoing Mail Port: 25 (or 2525)
Incoming Mail Port: 110
And here are the step by step instructions.
Please note if you are not running Windows 7, your screens may be slightly different those pictured below.
--- Initial Account Setup ---
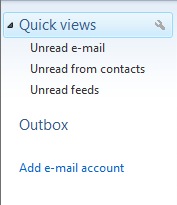
Select "Add e-mail account" from the left hand side panel. The account setup wizard will begin.
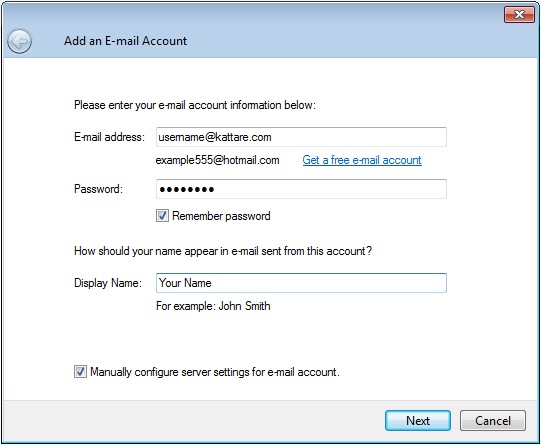
In the Add an E-mail Account window, enter your E-mail address, Password and Display Name (note: these are the name and e-mail address that will be displayed in the "From:" field when the recipient opens the e-mail). Be sure that the Remember password box is checked. When done, click on the Next button.
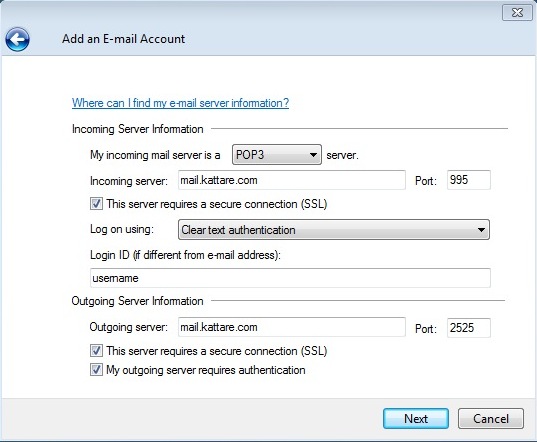
In the next window's Incoming Server Information, select POP3 for the incoming server type. Enter "mail.kattare.com" for the incoming server name. Check the box titled This server requires a secure connection (SSL) and select Logon using: "Clear text authentication". Be sure that the Login ID shown is your Kattare POP3 User Name supplied to you by your local Systems Administrator, IT Guru, or the Kattare Members Section Email Management Page. If it is not, enter that username in the box.
In the Outgoing Server Information, enter "mail.kattare.com" for the outgoing server name and enter port "2525". Check the box titled This server requires a secure connection (SSL) and My outgoing server requires authentication. Click the Next button.
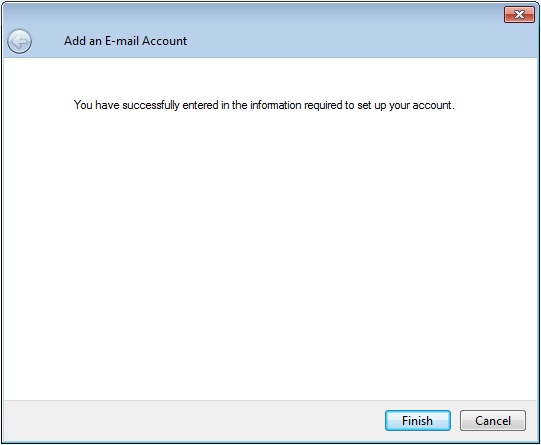
Clicking the Finish button will complete the account setup.
--- HELP! I Can't Send Mail! ---
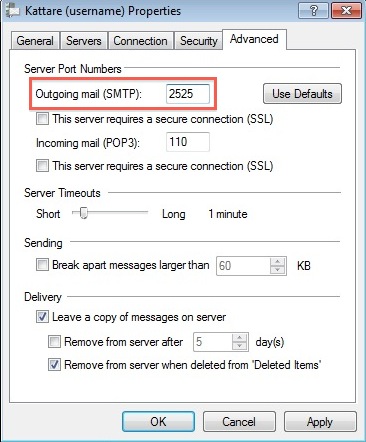
Some ISPs will block access to the standard outgoing mail port 25 if the connection is going to a mail server other than their own. To work around this, Kattare has configured an alternate outgoing mail server port on port 2525. If you find you have trouble sending mail through Kattare's outgoing mail server, you may try changing the Outgoing server (SMTP) to 2525. To do this, right-click the account name in the left side panel and select Properties. Select the Advanced tab. Here you can change the Outgoing mail (SMTP) server port number to 2525.
--- Don't Let Your Kattare Mail's Disk Quota Fill! ---
Has this happened to you before? You get a quota warning message from Kattare but do not have any mail in your inbox. This is because POP3 email actually copies a message from the server to Windows Live Mail. What it does with that original copy of the message left on the Kattare mail server is controlled by these settings in the Advanced Properties tab:
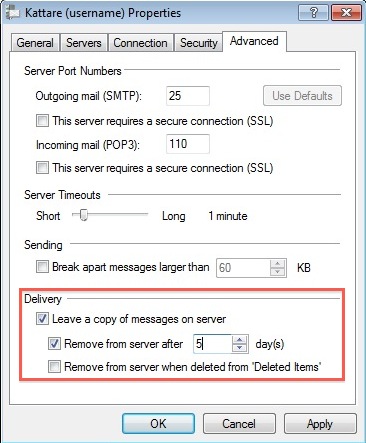
Be sure to set them as you see fit. We recommend to "Leave a copy of messages on server" and to "Remove from server after [5] day(s)".

